How To Use Your iPad As A Mobile Recording Studio
Using iPhones and iPads For Mobile Recording
Recording in general has never been easier or cheaper. I feel like I say that in every technology article lately. But it’s true.
Most musicians have at least a basic recording setup at home. One that’s perfectly capable of recording direct or live instruments. You really only need a humble interface, a couple reference monitors, a halfway decent computer, and a microphone or two (only if you’re recording live amps/acoustic instruments/vocals).
And I'm delighted to report that it’s just as easy to do this “on location”.
Back in the day, we used to have to put a tape recorder in an Igloo cooler while the band plays in the hyper-reflective garage (you know, as a totally made up, off the cuff example...). But most of us already have some or most of the equipment to do legit mobile recordings.
If you have an iPhone or an iPad, you’re already halfway there.
Why Would You Use An iPad To Record?

Space, money, portability, and overall convenience come to mind.
You might have a lot of recording gear, but live in an apartment. Your drummer has a sweet pad you can rehearse in, but no recording gear. It doesn’t make sense to bring your entire home studio set up. But it makes perfect sense to build a mobile recording set up.
Recording rehearsals, gigs or services utilizing an existing sound board, and even demos, albums, and EPs.
In a touch screen world, sometimes it’s just more convenient and efficient to use a touch screen instead of a keyboard.
Or maybe you’re on the road and want to record those late night inspirations that just came to you and will leave you just as quickly if you don’t get it down on tape.
Whatever your reason, here’s a list of what you’ll need.
Gear For A Mobile Recording Studio
Your equipment list will be as follows:
- iPad/iPhone
- DAW App
- Interface
- Powered USB Hub (if you use a USB powered interface)
- USB to lightning adapter
- Headphones
And of course any microphones and cables you’ll need, depending on how many tracks and live instruments you intend to record.
I’ll go more into detail on recommendations in a bit.
General Signal Flow
Think about it like this: the biggest difference is your iPhone or iPad is replacing your computer. The signal flow doesn’t change much. You will have to get an extra (cheap) item or two though.
If you’re using a USB powered interface like the Scarlett 2i2 or 4i4, you’ll need a powered USB hub. While your computer can easily power the interface, your iPad can’t. Here’s what the signal flow will look like in that case:
Interface > Powered USB Hub
Powered USB Hub > Camera Adapter
Camera Adapter > iPad
*iPad Charger > Camera Adapter
*If you are using a camera adapter with that option. If not, charge that baby up and cross your fingers for long battery life.
If you’re using an interface with wall power, you won’t need the powered USB hub.
You’ll run your microphones, instruments, or MIDI devices into your interface. Set levels, arm your track(s), and record.
Interfaces, Monitors, and DAW (*oh my!)
(*I know, that “joke” made me sick too)
Since we’re talking about mobile recording, we need mobile optimized gear. Think about everything you might carry to a rehearsal. Now add recording gear on top of that. How much gear and weight do you want to lug around?
Gear that’s light in weight and relatively compact will be your best friend. And thankfully there are plenty of options.

First, decide on how many inputs and outputs you need. If you just need a stereo live recording, a 2 input interface will work just fine. If you’re going to track instrument by instrument for a demo, you’ll need at least 4 for the drums (Kick, Snare/hats, stereo overheads).
For live recordings and tracking, add an extra input for each additional instrument.
I mentioned the Focusrite Scarlett interfaces earlier. They’re probably the most popular budget interfaces out there right now.
Another budget friendly option is the Behringer UMC404HD (4 channels, though they have an 8 channel interface too), and the PreSonus 68c 6x6 (also available in several in/out configurations). You can’t go wrong with any of these.
I wouldn’t recommend bringing reference monitors into the equation for mobile recording. Just get a good set of head phones for the road. You can mix on your main studio monitors at home.
Also, don’t get headphones from a non-audio equipment manufacturer. If they only make headphones, skip them. Sorry-not-sorry Beats by Dre. These tend to be EQ’d for listening to music and don’t provide a true reference. A couple brands to look for are Sennheiser and AKG. Prices are going to vary by model, but something between $50-$150 will be good.
Get a ton of XLR and TS cables. Way more than you think you’ll need. Because something is bound to not work at some point.
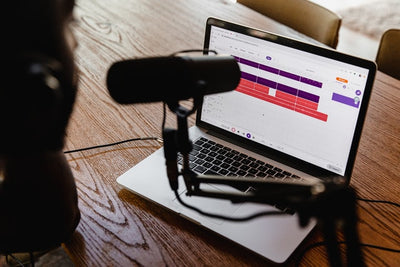
Once you have your gear wish list made, it’s time to think about a mobile Digital Audio Workstation (DAW). You’ll want something optimized for mobile.
Cubasis by Steinberg (the same company that makes Cubase and Nuendo) and Auria are going to be your two best bets. They’ll cost up to $50 for the apps and both are super flexible. You’ll be well off with either one, so check them out to see what options are going to work best for you. For those that will ask...yes you can also use Garage Band, but like all things music gear; you get what you pay for.
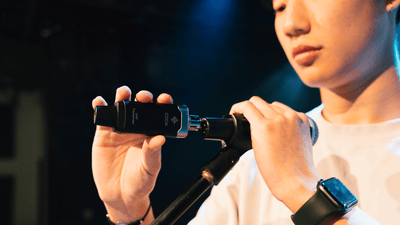
Controlling The Recording Hands-Free
If you’re one of the musicians recording you’ll want to consider a Bluetooth or MIDI foot controller. With any software you can set your MIDI or keyboard commands. With either of these you can control arming a track, recording start/stop, play, play from marker, etc.
(As long as your MIDI controller has Bluetooth capability, you can send the commands wirelessly to your iPad)
Here is a great resource that goes into greater detail. It’s targeted to ProTools, but the idea will be identical in our application.
And here’s an article dedicated to connecting your MIDI controller to your iOS device.